How to Create a New User in OktoRocket
How to Create a New User in OktoRocket
This step-by-step guide is intended for site managers and administrators who are responsible for onboarding new users in OktoRocket. The instructions below cover everything from accessing the Users tab to creating a user and configuring their permissions.
Step 1: Navigate to the Users Tab
From the OktoRocket admin dashboard, locate and click on the “Users” tab in the left-hand menu.
The Users screen will display a list of all existing user profiles for your instance.
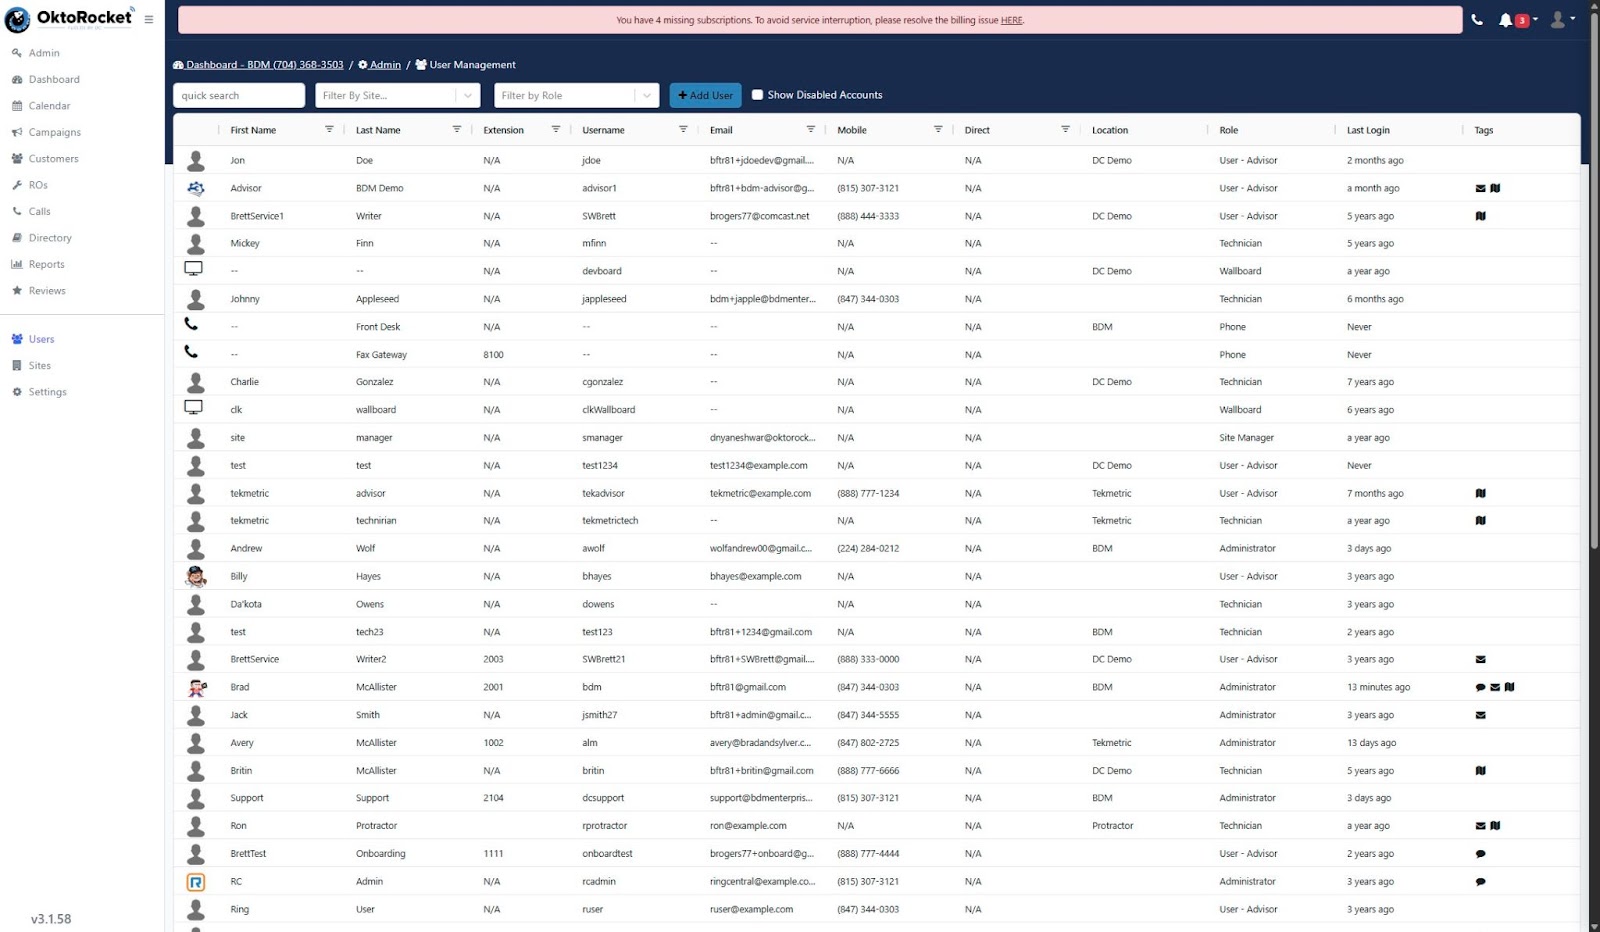
Optional filters you can apply:
Search Bar: Enter part of a name or username to quickly find users.
Site Filter: Narrow the list by selecting a specific location.
Role Filter: Show only users assigned a specific role (e.g., Advisor, Technician).
Step 2: Add a New User
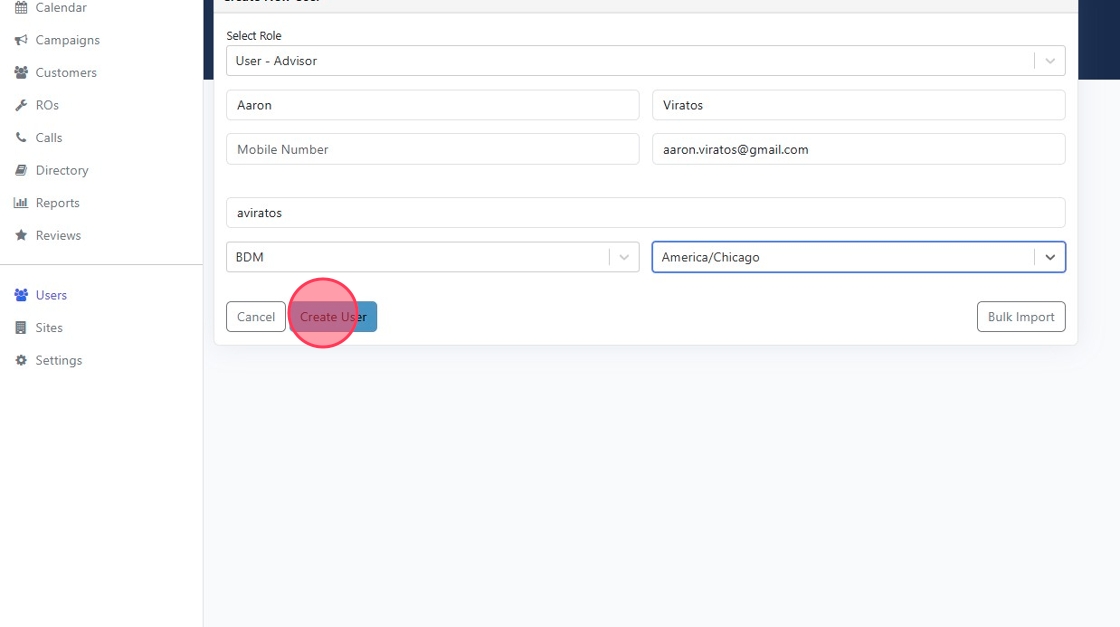
At the top of the Users screen, click the “Add User” button.
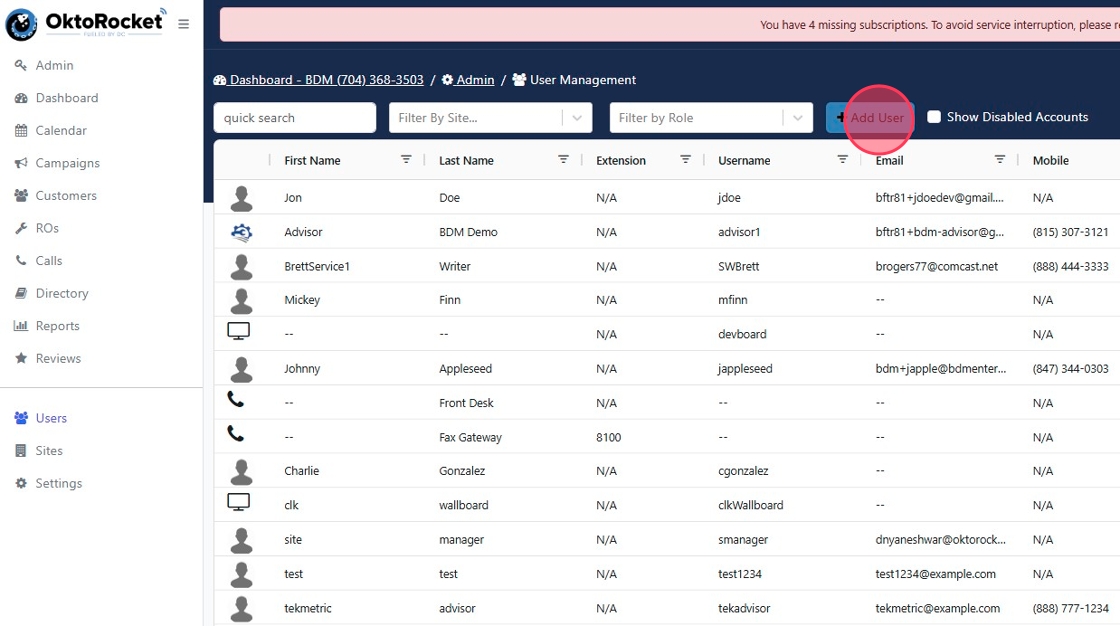
This opens the New User Creation form.
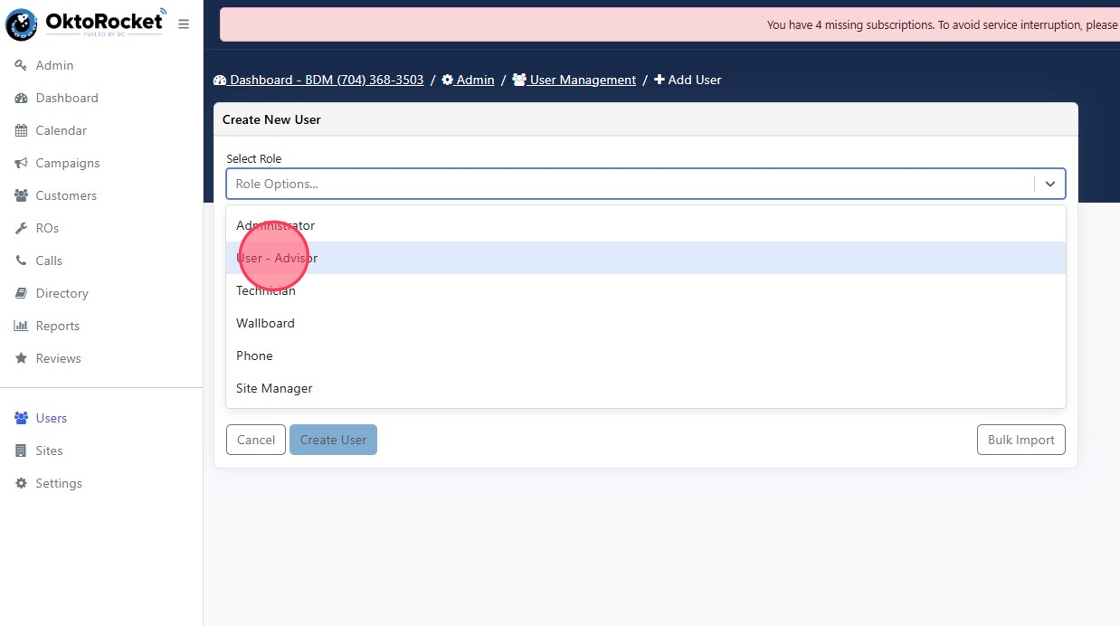
2.1 Select an Account Role
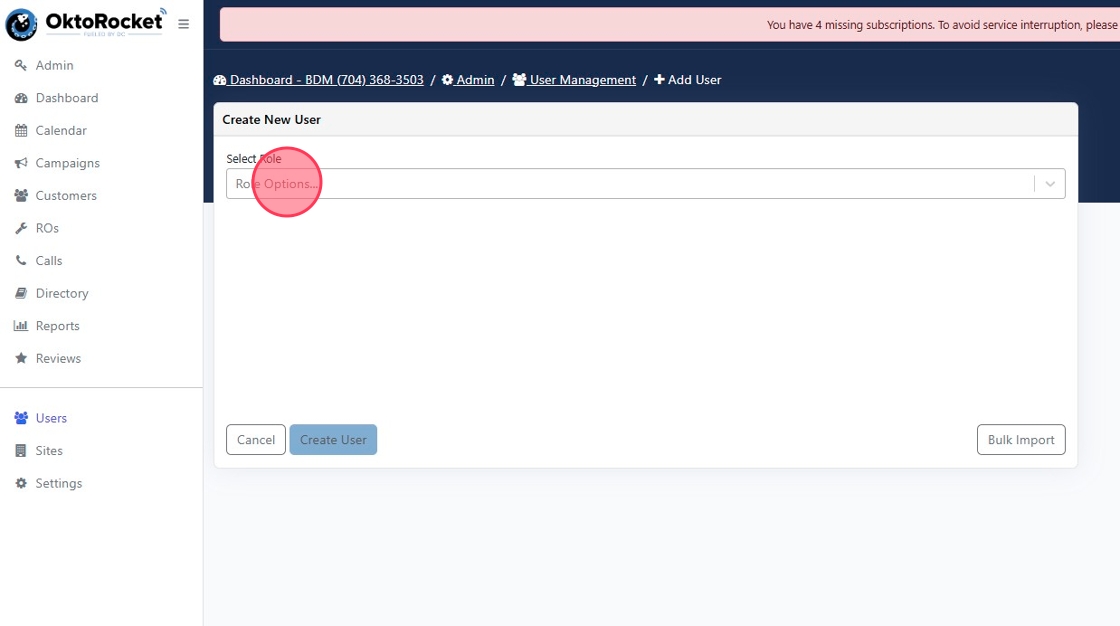
At the top of the form, choose one of the following Account Roles using the dropdown menu:


2.2 Enter Basic User Information
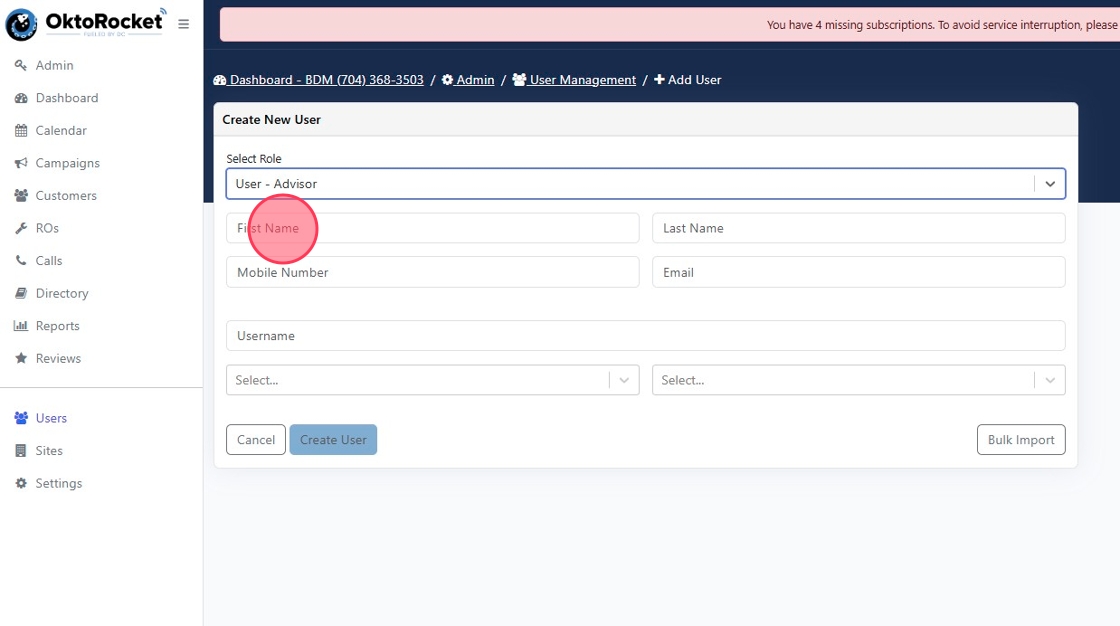
Fill in the user’s details manually:
First Name – Required.
Last Name – Required.
Mobile Number – Optional but recommended if the user will receive SMS alerts.
Email Address – Required. This is where the invite and password setup link will be sent.
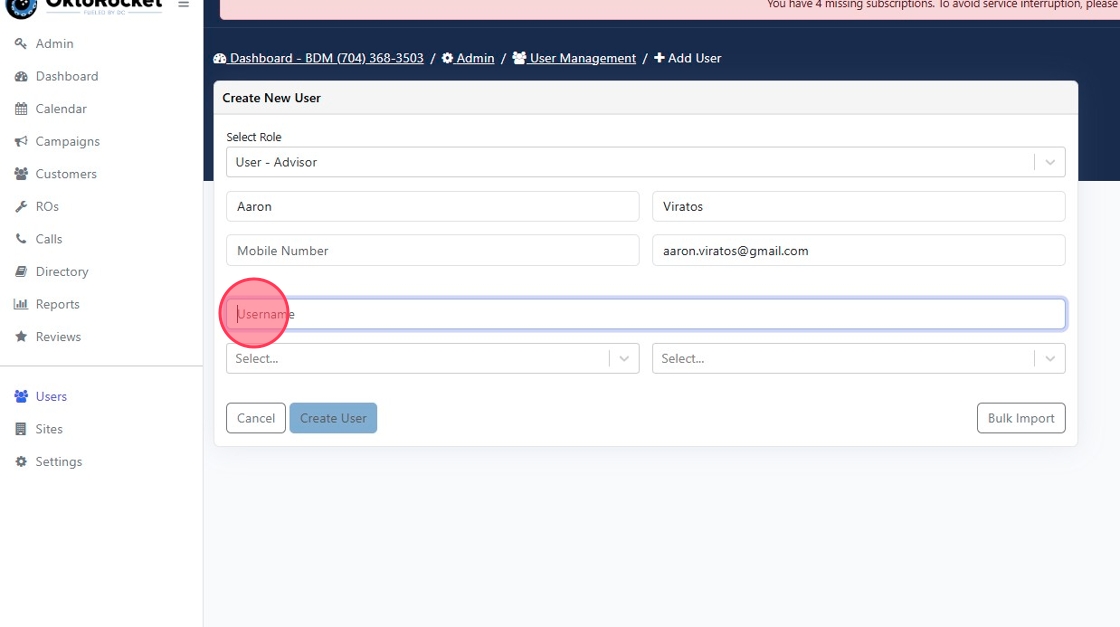
Username – Required. Must be manually entered.
Common format: first initial + last name (e.g., jsmith)
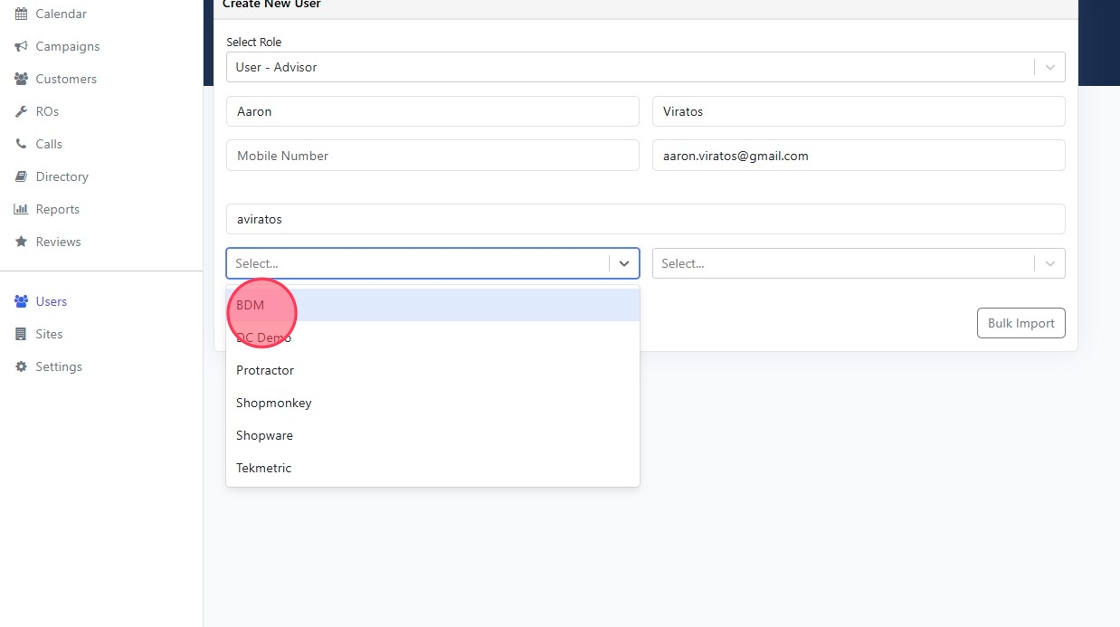
Location Assignment:
Use the dropdown menu to select the site or location the user will be attached to.
Only one location can be selected at this stage.
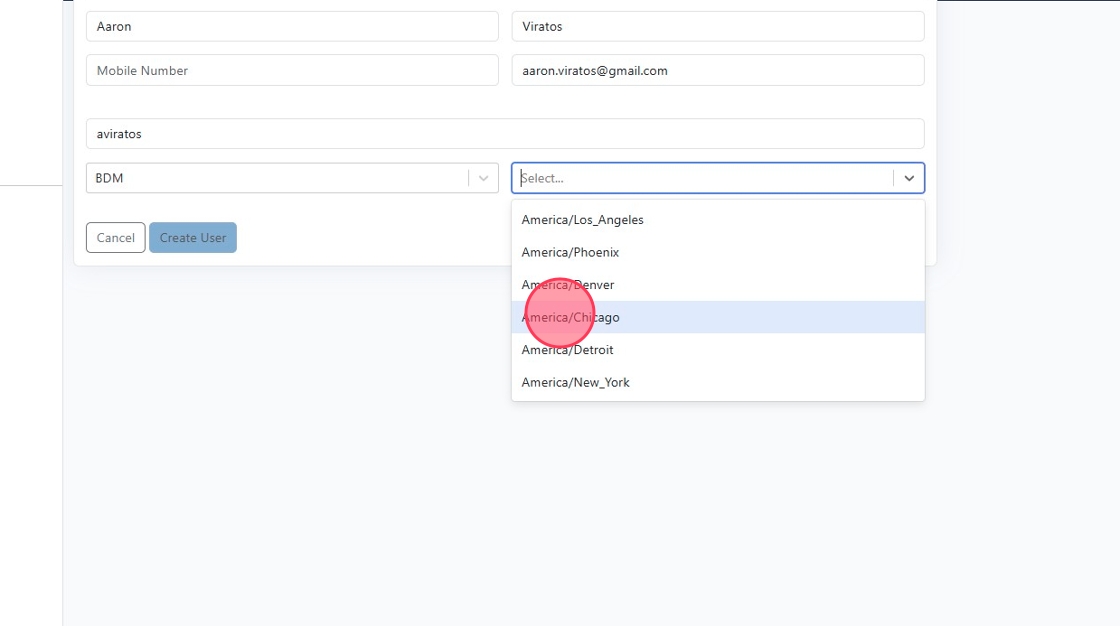
Time Zone:
Use the dropdown to set the correct time zone for this user’s region.
This ensures scheduled calls, tasks, and alerts align correctly.
Once all fields are complete, click the “Create User” button.
Step 3: Configure the User Profile (Post-Creation)
After the user has been created, additional options will become available for configuration.
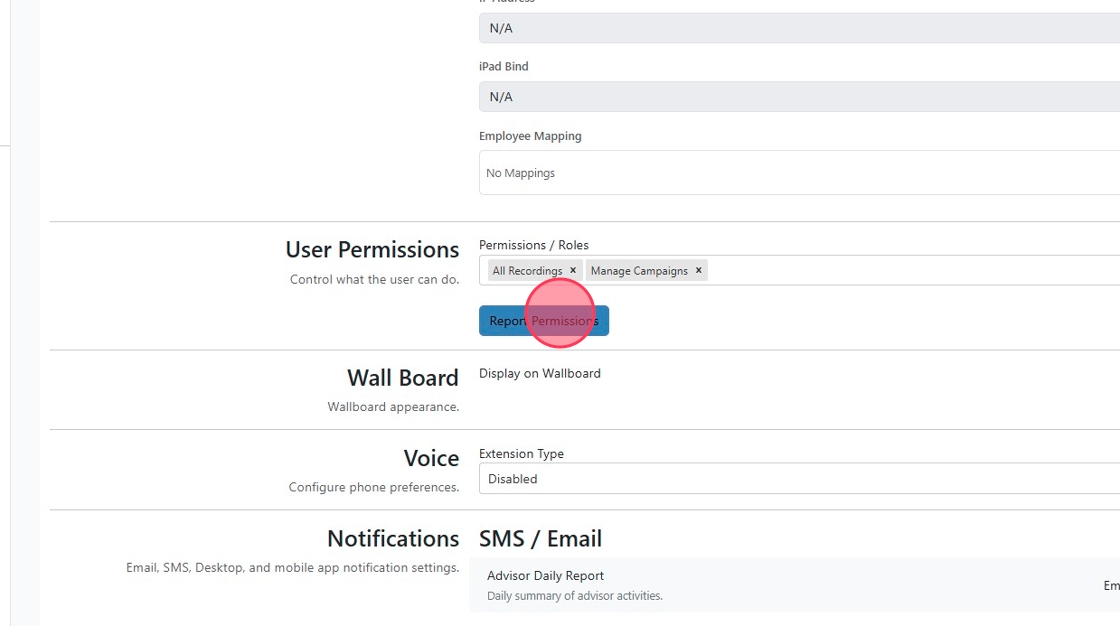
3.1 User Permissions
You can now assign permissions by toggling individual access levels:
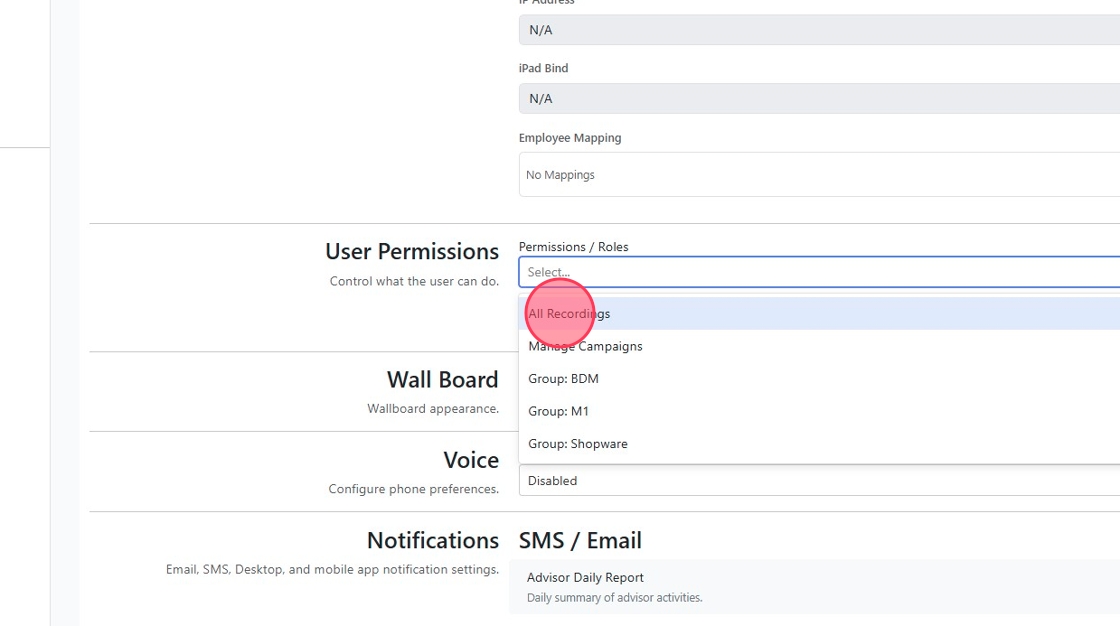
View all calls and recordings
Manage campaigns (create, edit, delete)
Assign to multiple site groups if applicable
Wallboard visibility if the user's performance should display on an external screen
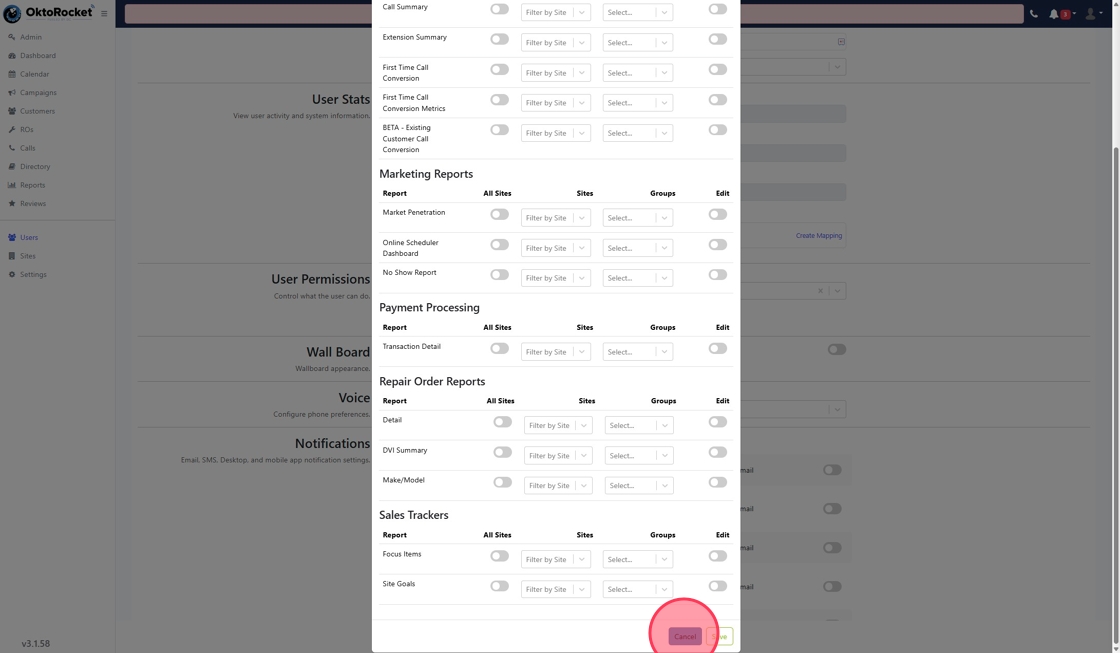
3.2 Report Permissions
This section allows the admin or site manager to grant the user access to key reports:
Enable view-only access to specific reports
Allow edit access for users who need to generate, modify, or export reports
Tailor report access based on role responsibilities or location requirements
3.3 Voice Configuration (Phone Settings)
If the user will be assigned a phone:
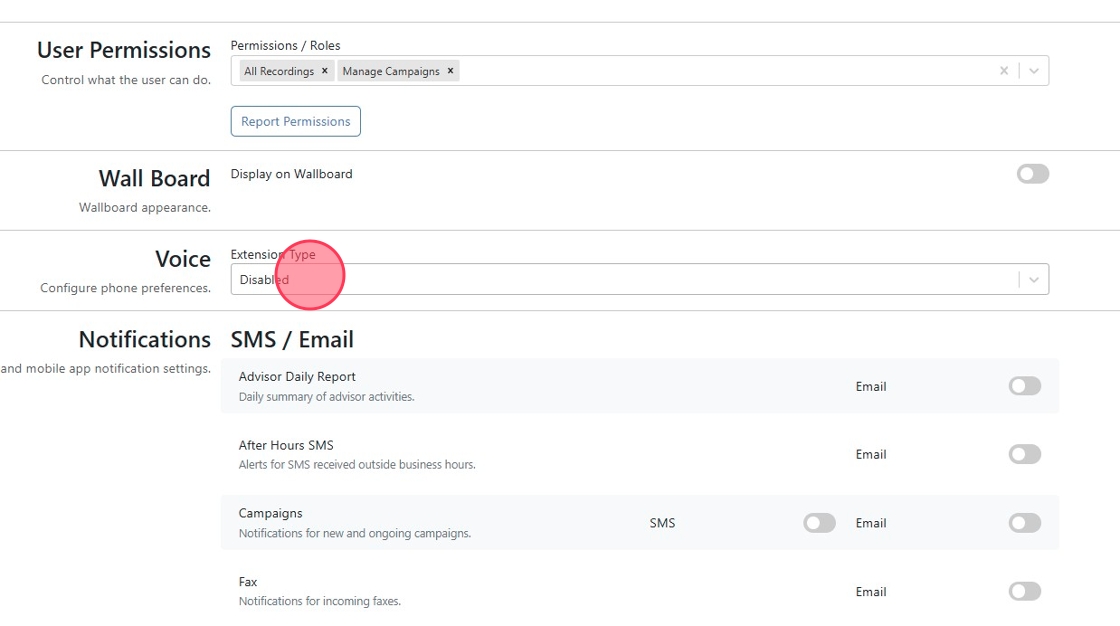
Scroll down to the Voice section.
Choose the Extension Type (usually "IP Phone").
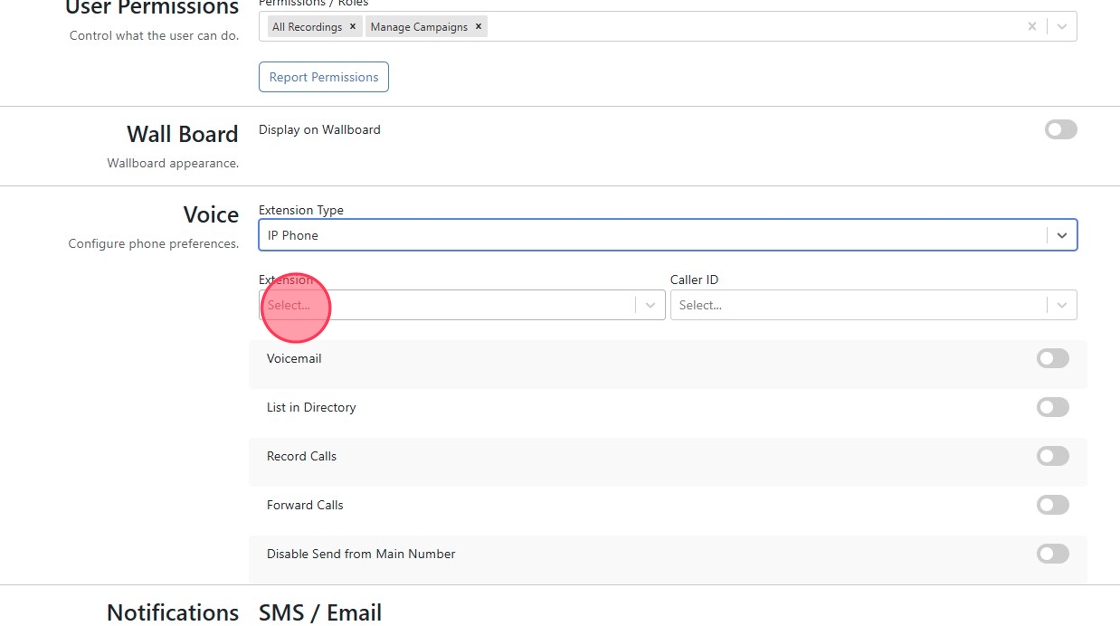
Assign a unique Extension Number (e.g., 1007).
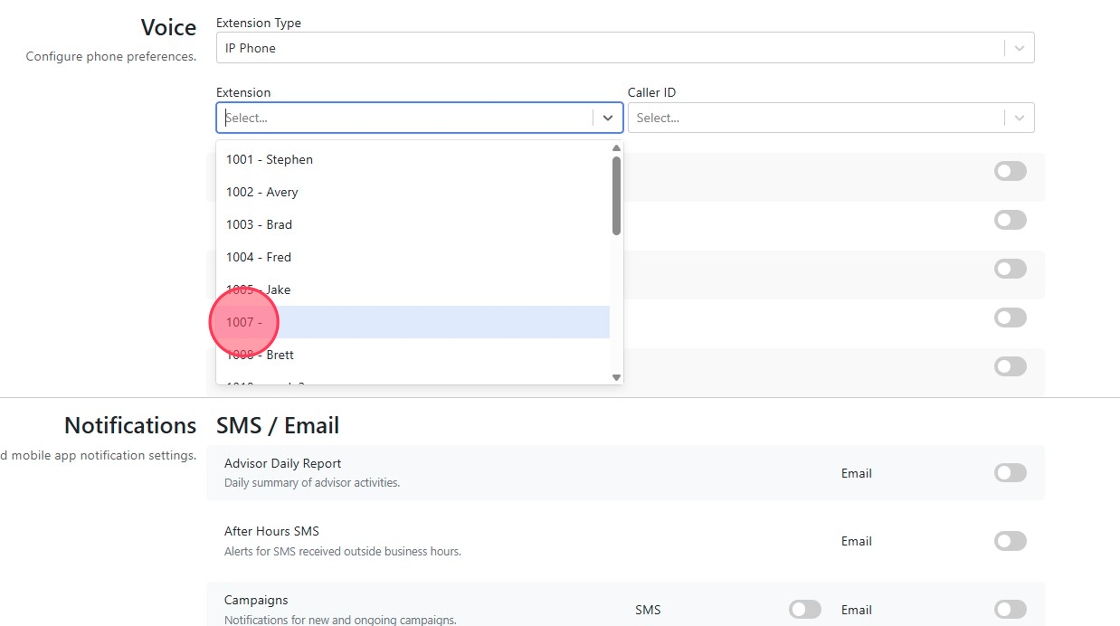
Set the Caller ID to reflect the site’s main phone number.
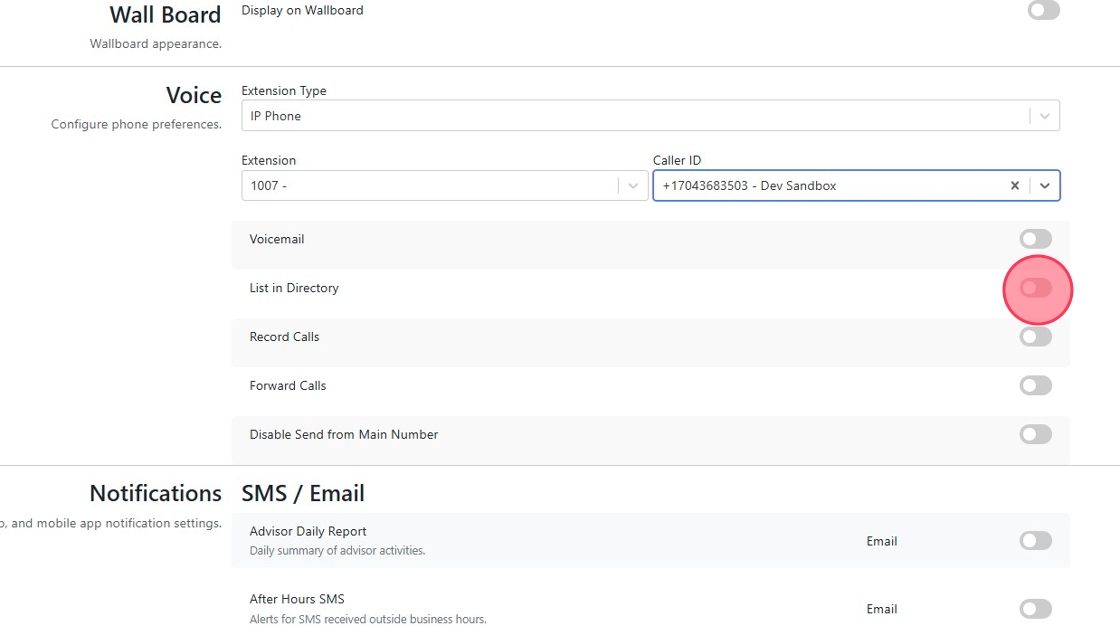
Optional toggles:
Enable User Voicemail
List in Directory
Record Calls (recommended for quality assurance and call history)
Call Forwarding
Disable Send from Main Number (if using a direct line instead)

To remove an assigned extension:
Under Extension Type, select "Disabled".
Click “Save Changes” at the bottom of the user profile to confirm.
This action will unassign the phone extension and make it available for other users.
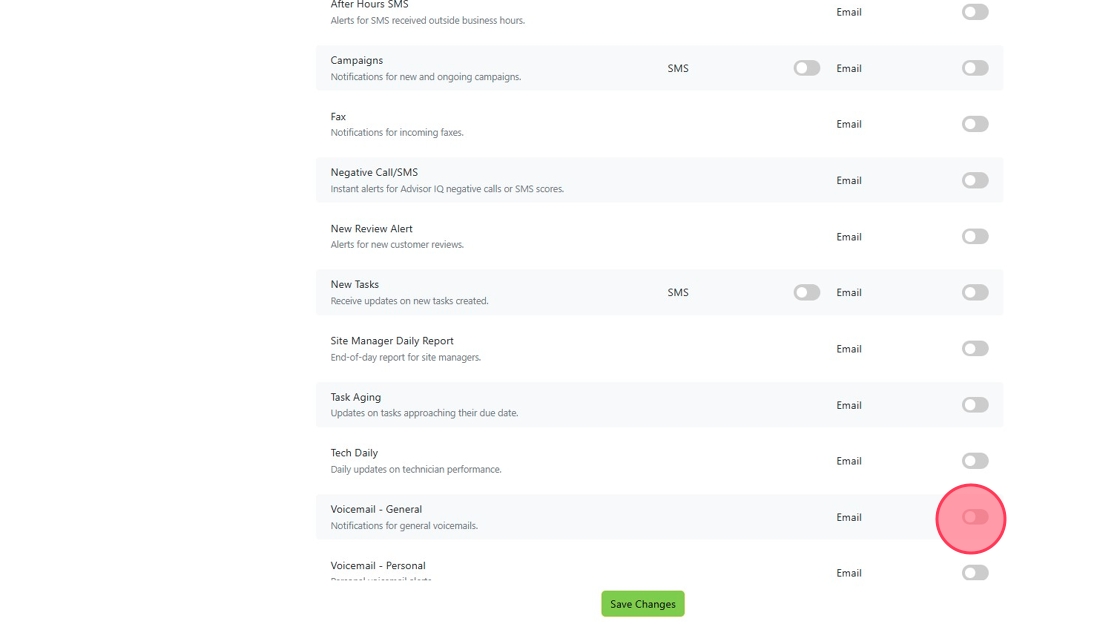
3.4 Notifications (SMS/Email)
You can configure notification preferences for this user:
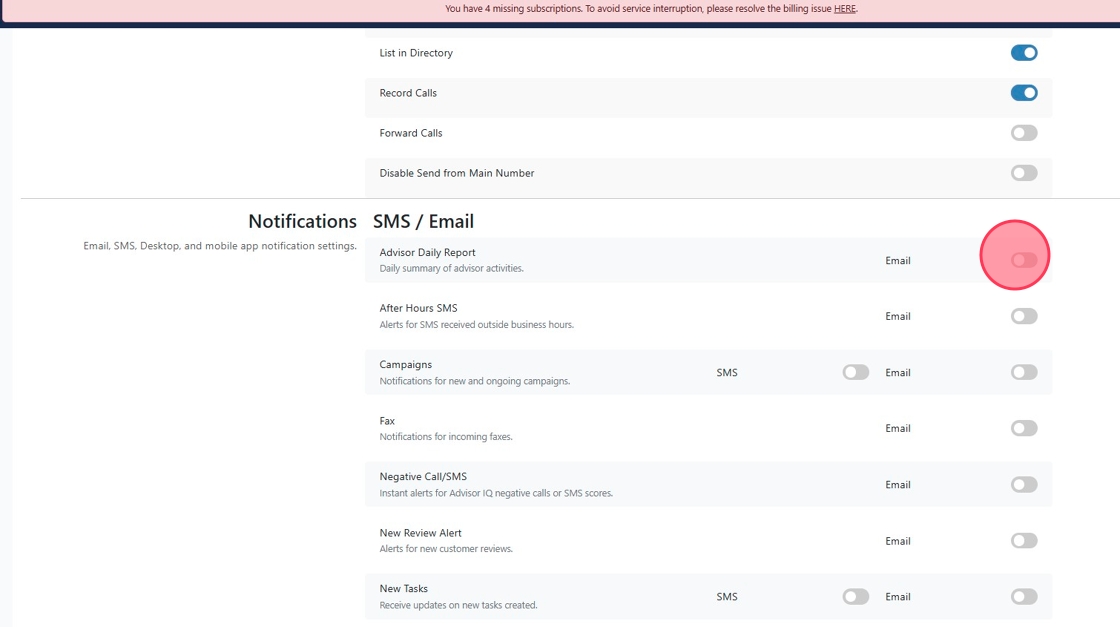
Enable notifications for various triggers:
Daily advisor reports
Campaign updates
Negative call alerts
Choose delivery method:
Email
SMS (mobile number must be filled in)
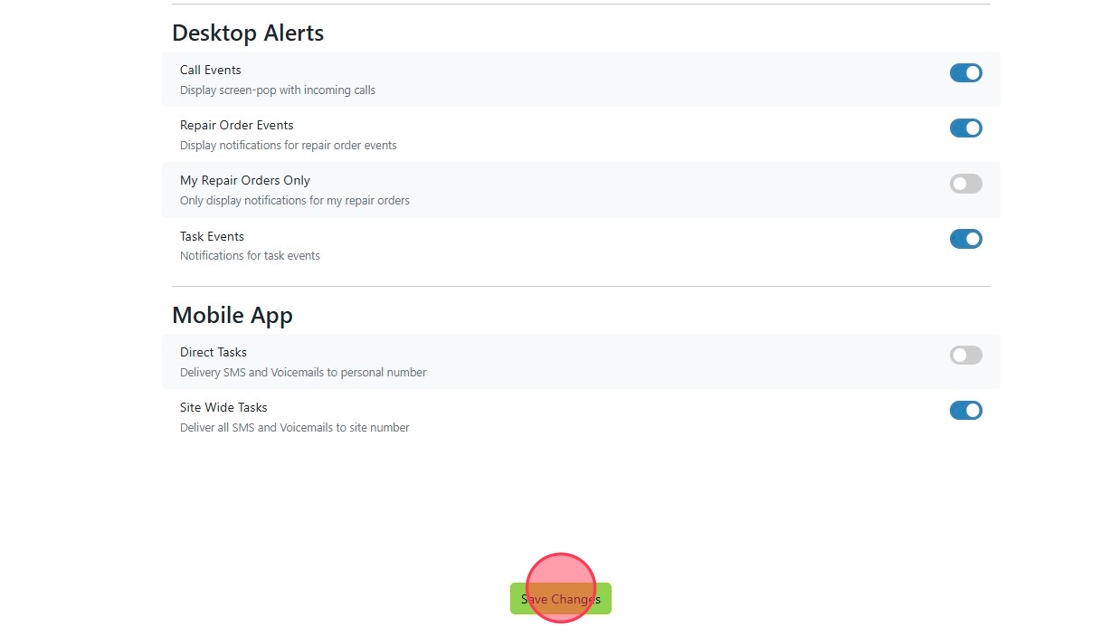
3.5 Desktop Alerts
These are visual pop-up notifications within the OktoRocket dashboard.
Events such as:
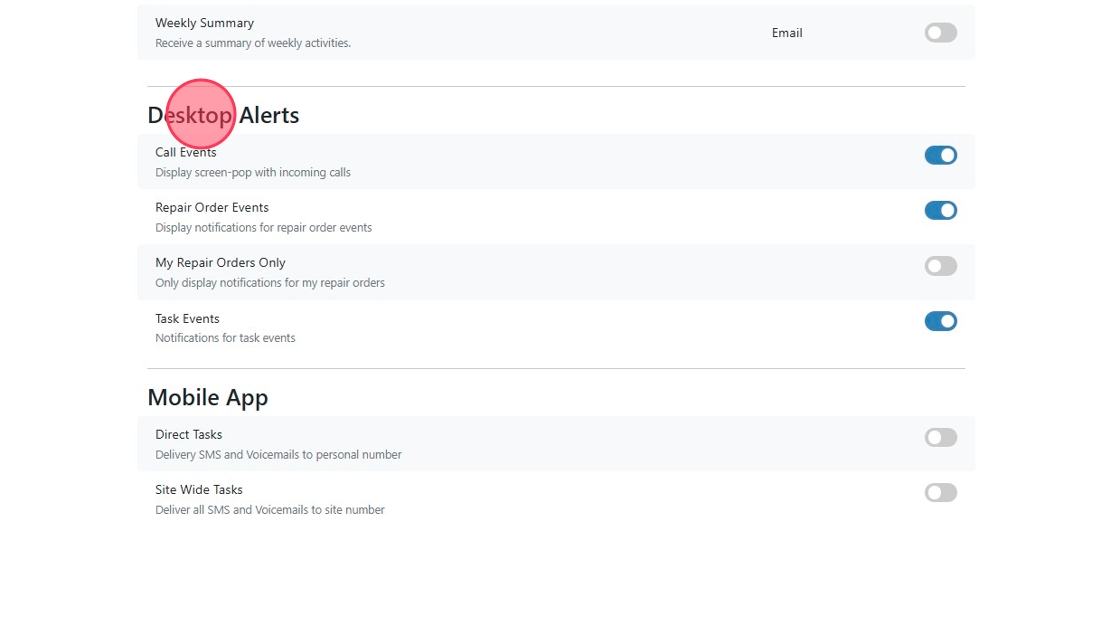
Incoming calls (appears at the bottom-right of the main display)
Repair order updates (all or user-specific)
Task creation or updates
3.6 Mobile App Access (Optional)
If your team uses the DC Connect Plus mobile app:
Assign task visibility for the app:
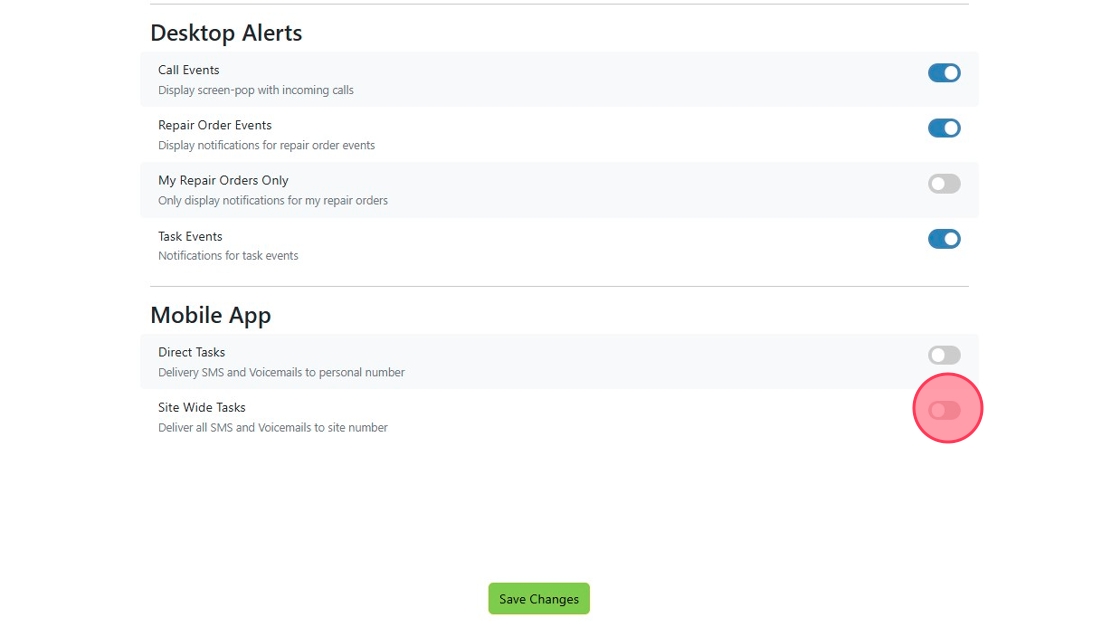
Site-Wide Tasks – Recommended for most users.
Direct Tasks – Use if the user has a dedicated number.
This will give them access to messages, tasks, voicemails, and calls on mobile.
Save Changes when you are finished.
Account Activation (User Experience)
Upon creation, the user receives an email invite:
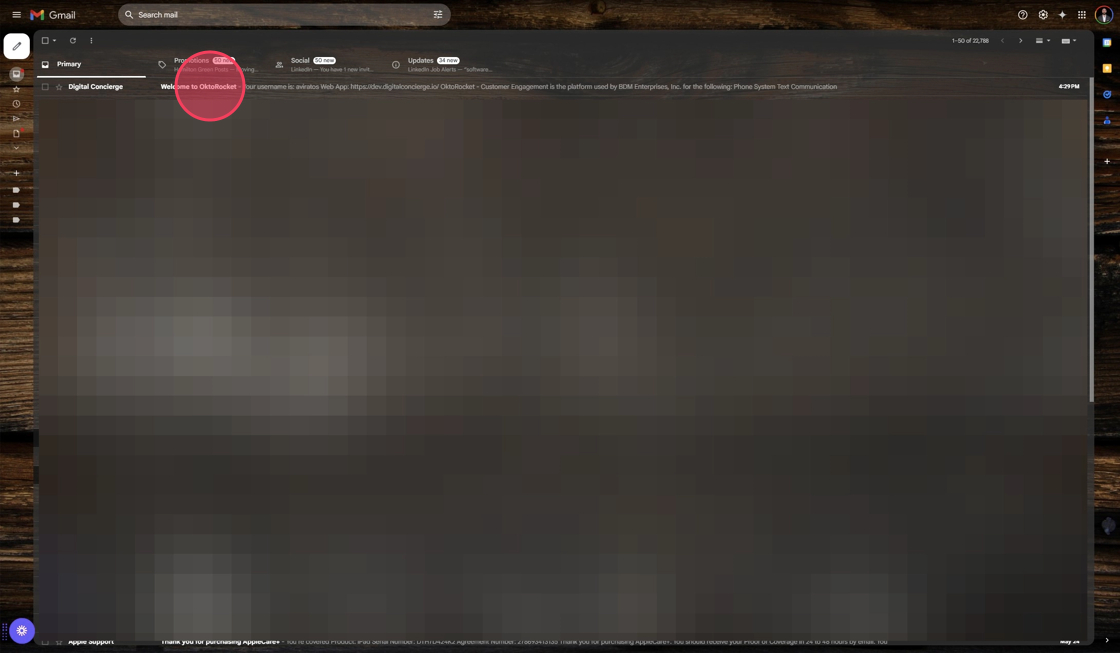
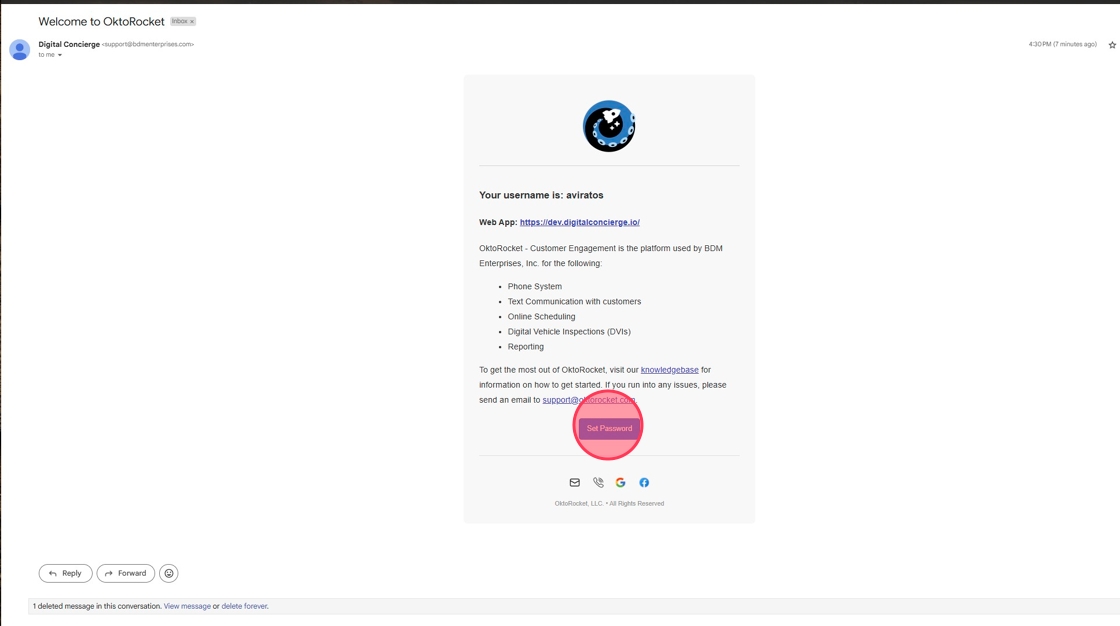
Includes:
Their username
The instance link
A link to set their password

Once the password is set, they can log in directly.
Optional Actions After Setup
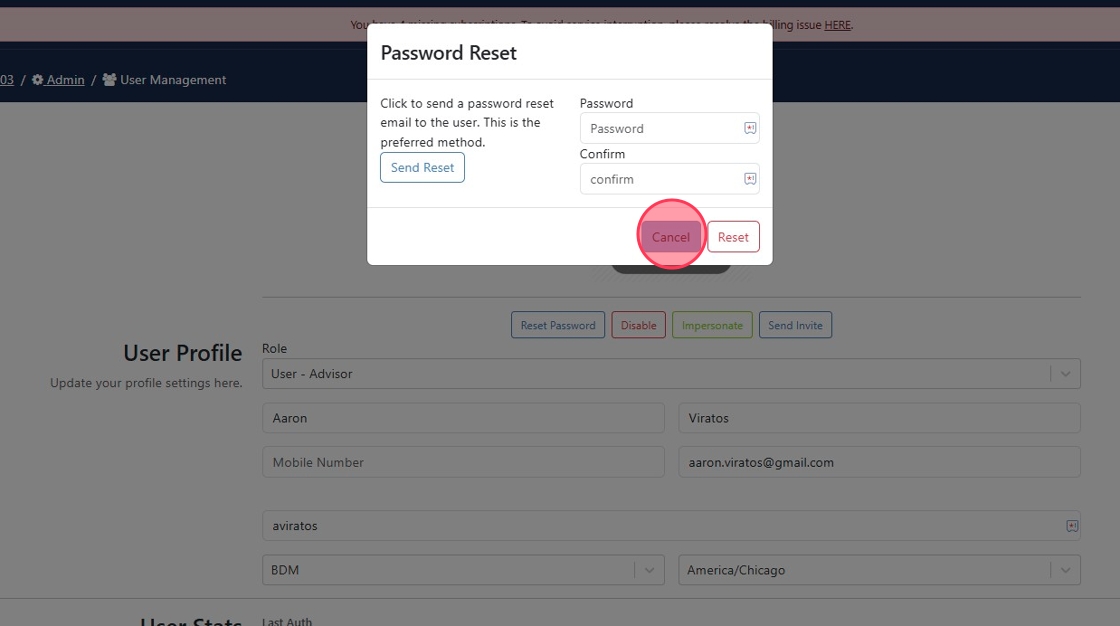
Resetting a User’s Password
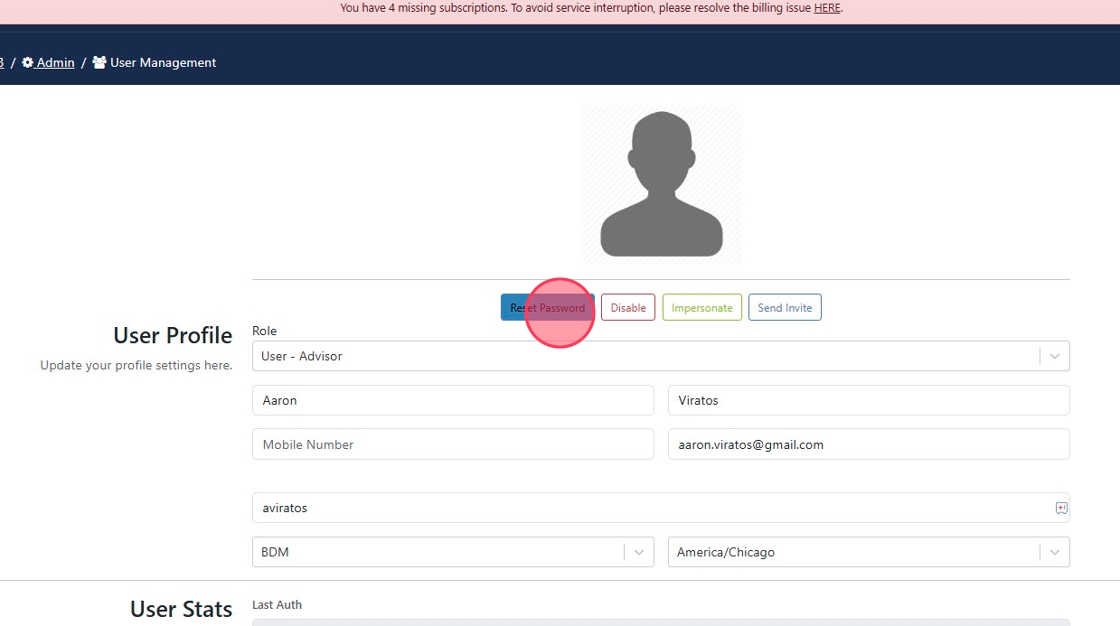
Navigate to the user profile.
Click “Reset Password”.
Choose from:
Email Link – Sends reset option to the user’s email.
Manual Entry – Admin sets and confirms a new password.
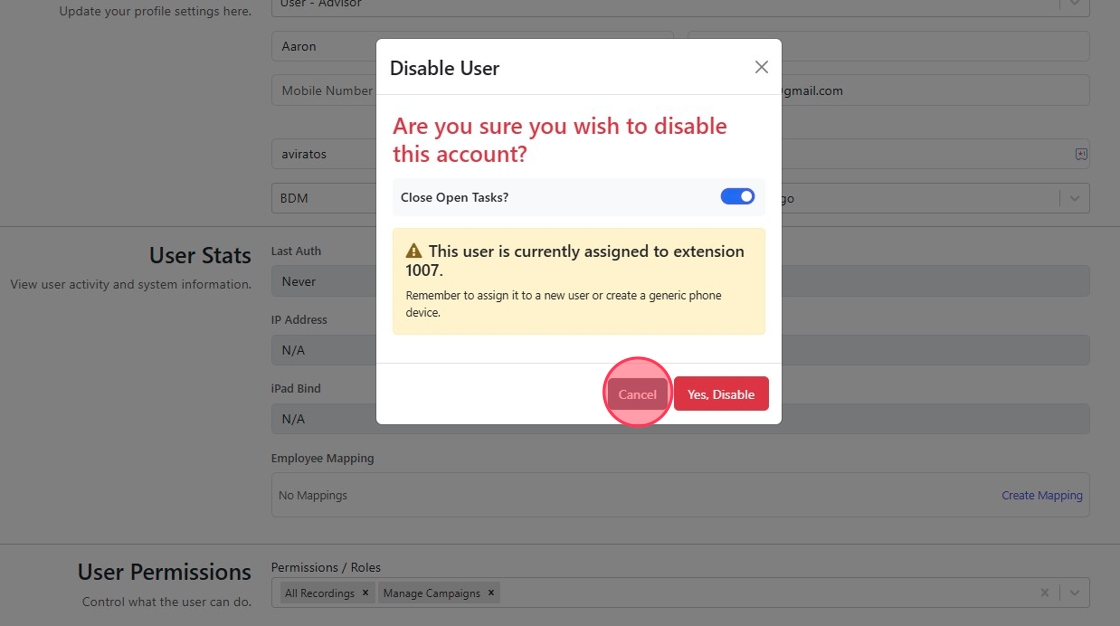
Disabling a User Account
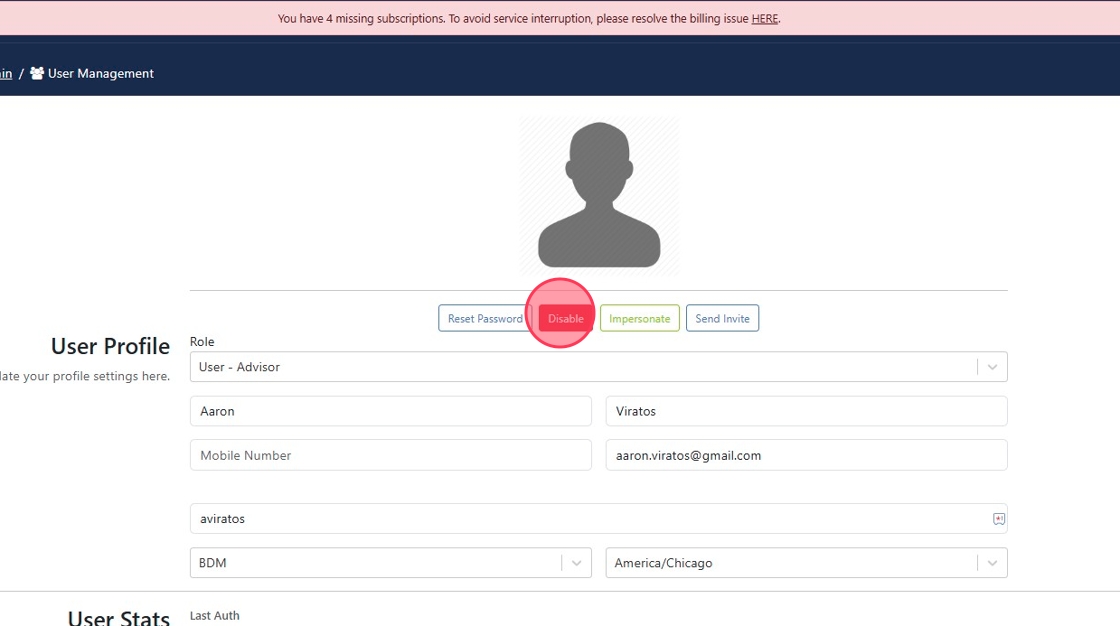
If a user is leaving the company:
Open their profile.
Click “Disable”.
In the popup:
Toggle ON to automatically close open tasks.
Toggle OFF to retain open tasks.
Confirm to:
Disable the profile
Free up any assigned extension
Manage or preserve task history
Related Articles
Employee/User Management
This article highlights how to add users to DC. Depending on the modules your company uses along with your shop management system, these steps will differ. Adding the user to DC Log into DC as an administrator. Click on Users in the left navigation. ...Call Pop Notifications
Update - Click Here for a how-to video covering the information in this article. Pop Notifications are Windows desktop notifications that appear in the lower right corner of the screen. There are 4 types of Pop Notifications OktoRocket CE can create: ...OktoRocket Release Notes
OktoRocket Release Notes - June 11, 2026 Enhancements We listened to some feedback about the enhanced call pop and introduced some more granularity to control its visibility: Users can now control whether they want it to show on their Tekmetric or ...Managing User Notifications
This guide provides a straightforward process for managing user notifications within the digital concierge platform, ensuring efficient communication and user engagement. By following the easy steps outlined, users can quickly update notification ...OktoRocket Dashboard
OktoRocket Dashboard – Step-by-Step User Guide The OktoRocket dashboard is the central hub for managing customer interactions. It is accessible to all users, but advisor-level users have it set as their primary interface upon login. 1. Accessing the ...